Dawn's Inspirations

MDF Beach Hut with Mini Paper Bag Album Project

IMG_1084

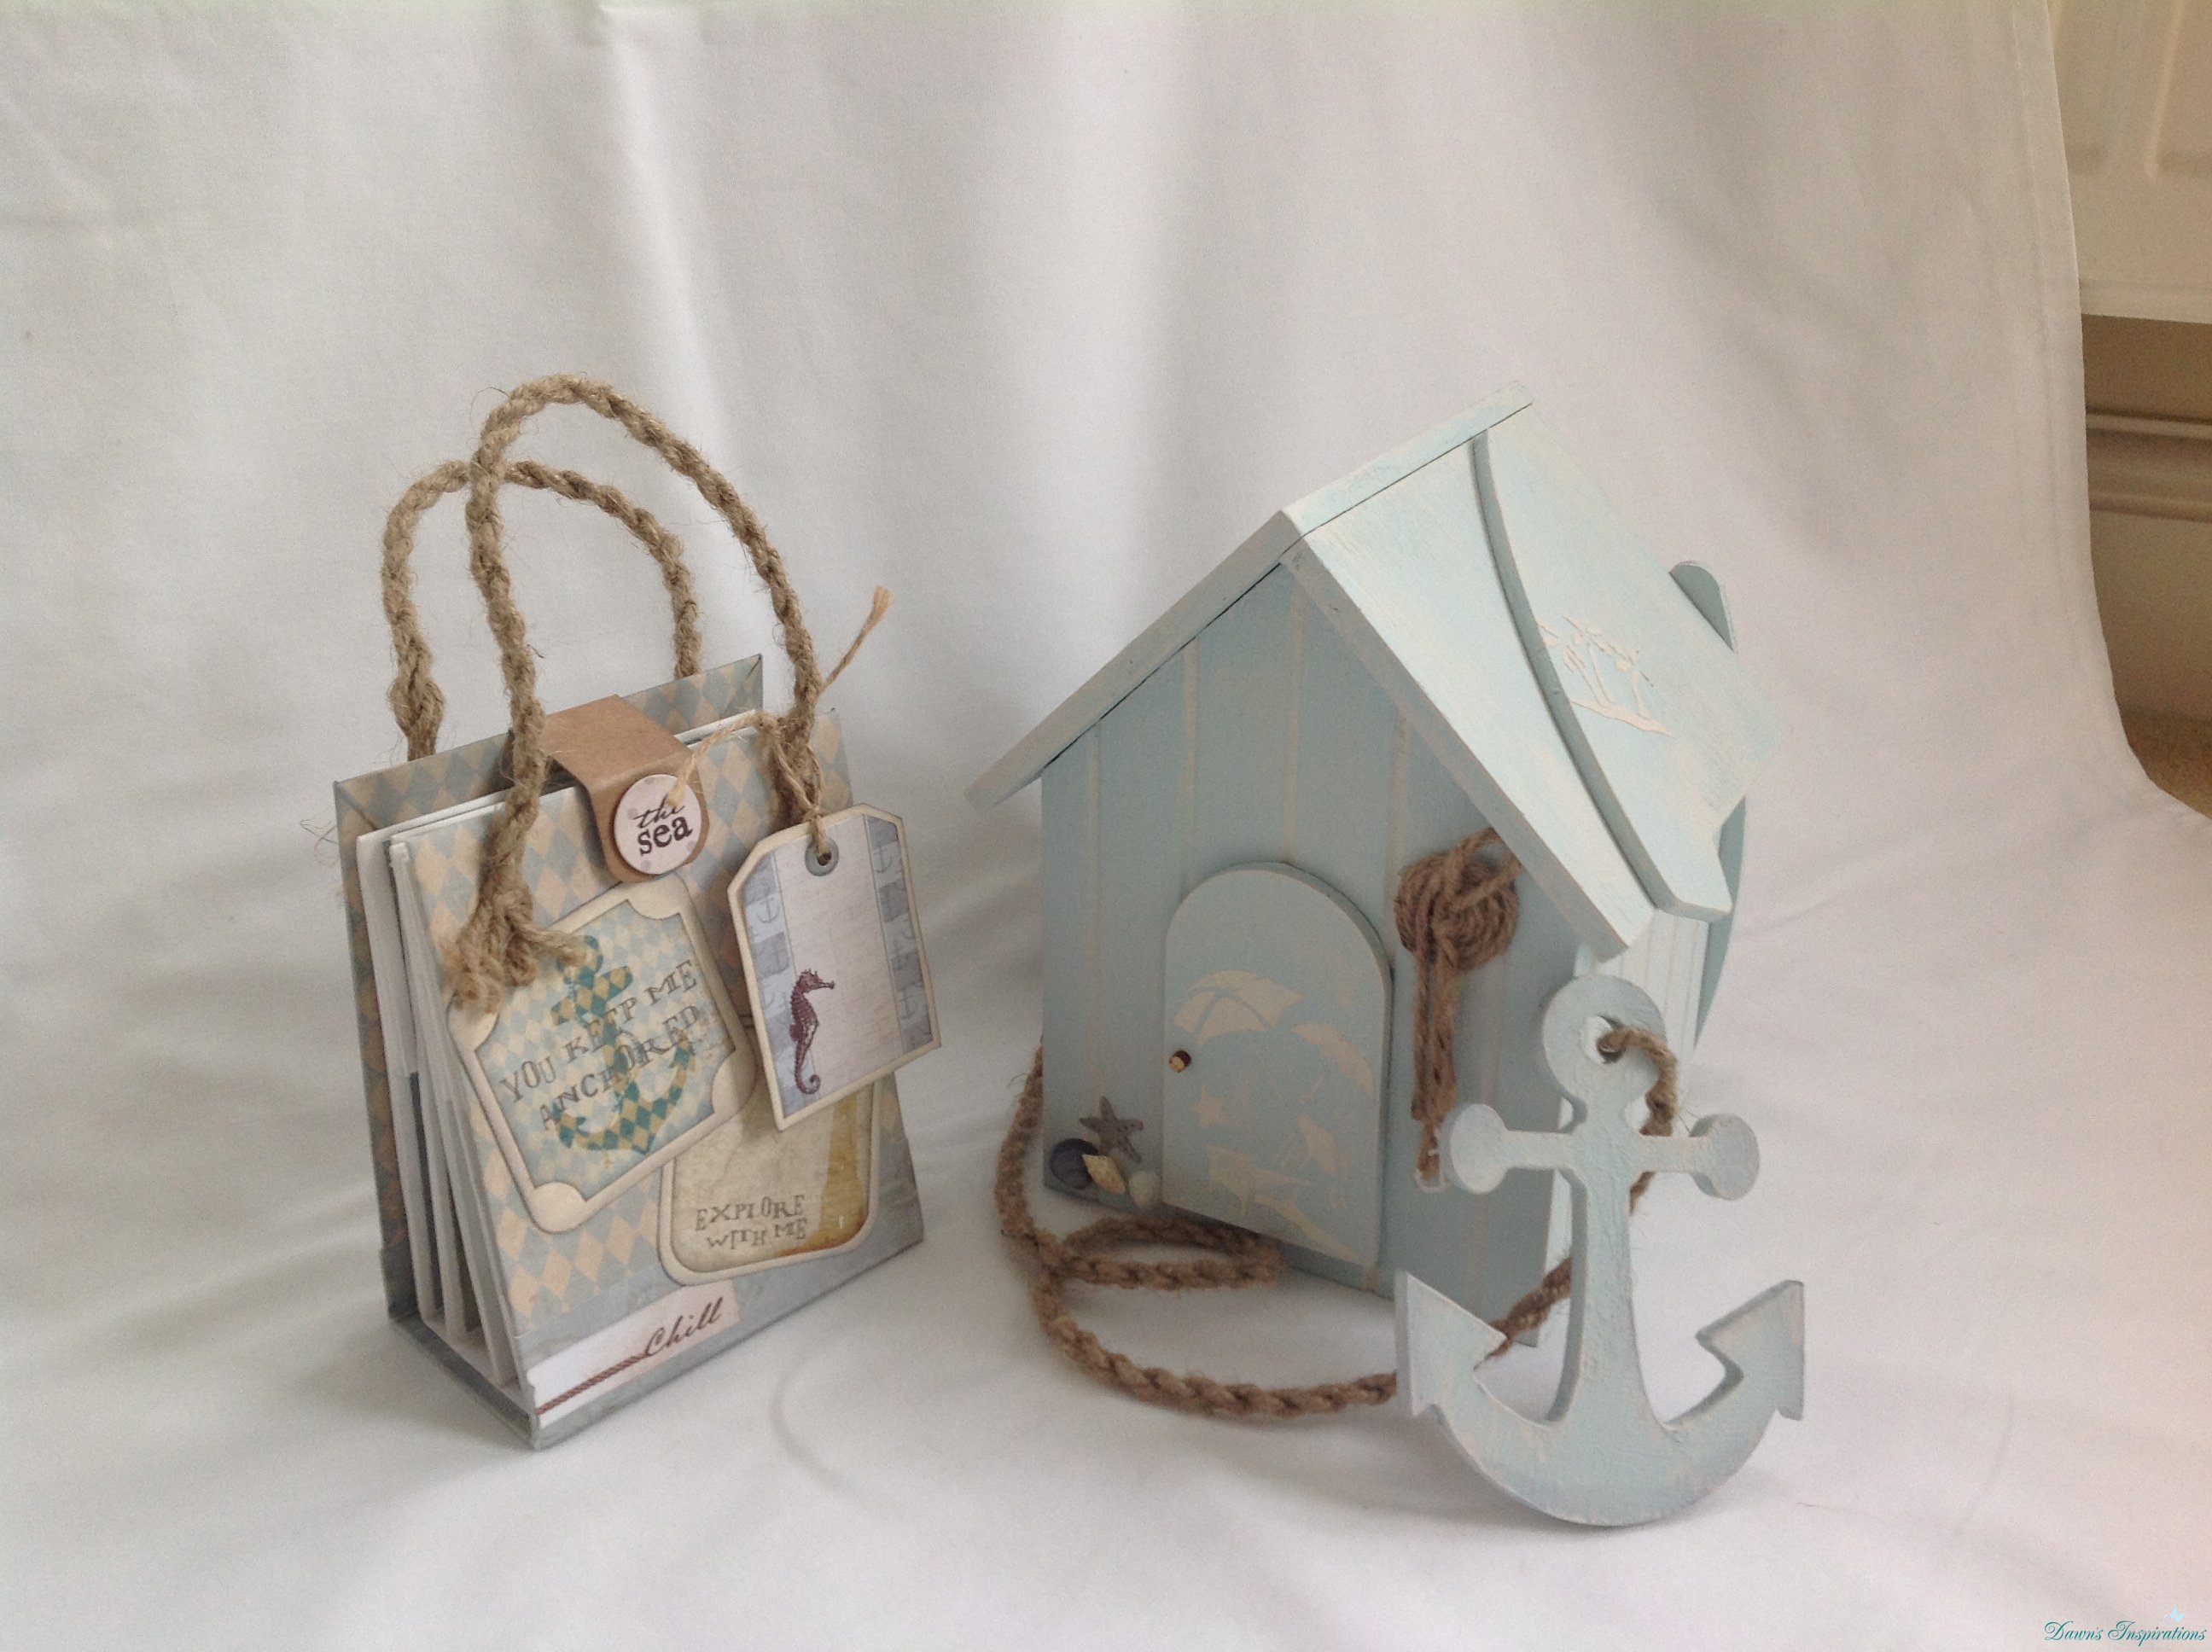
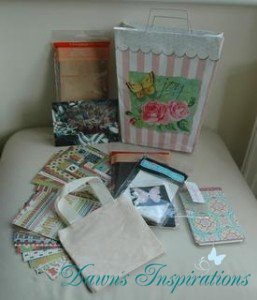
I decorative this Beach Hut at a Workshop that I attended at the MDF Mans Studios.
This was should have been a Money Box however, you know me!!! –
It had to have a Mini Album inside.

Rob (AKA MDF Man) made me a spacer for the roof so it would lift off easily and was the door for me to access the mini album.

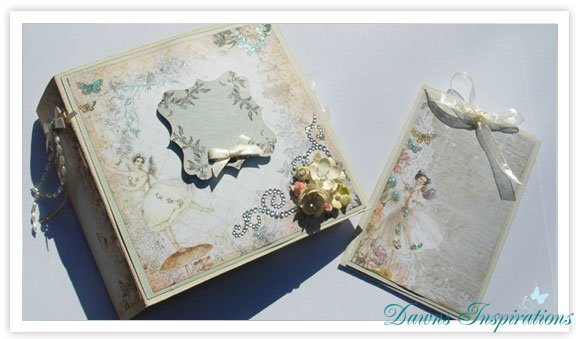
The mini album is made using some of the papers and tags from the Prima Seashore 12×12 Paper Collection Pad.
I also used 4 white paper bags in size size 3½” x 6 ¾” x 2” which Maria kindly sent me from America.
The cover was made using a food packet box which I cut down and the rope handles are made from garden twine.
This was going to be a gift but I am finding it hared to give away, I think I may have to make another one. I do hope you like?

Filed Under: Free Tutorials

Paper Bag Pocket Wallet Mini Album

IMG_0941 
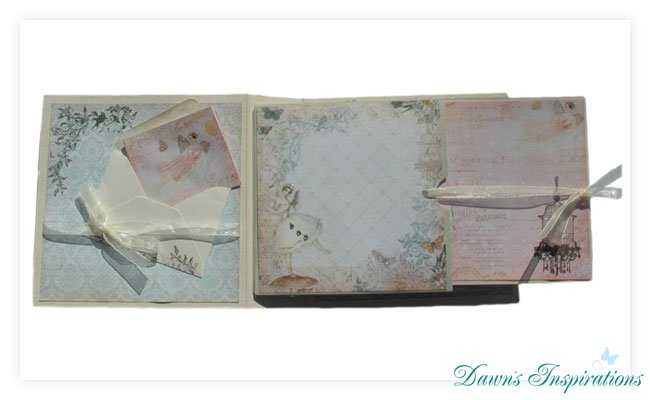
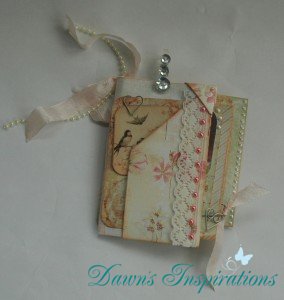
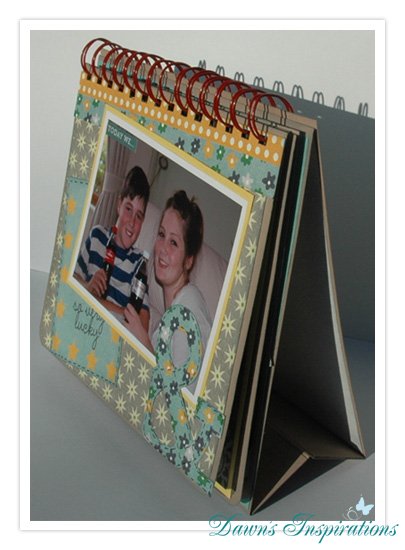
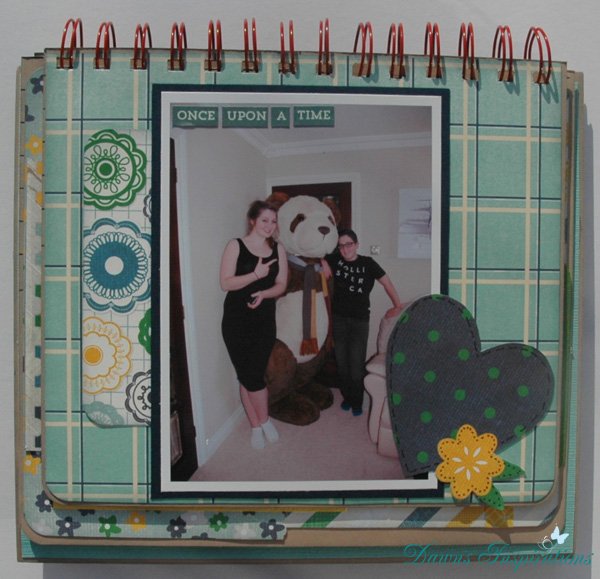
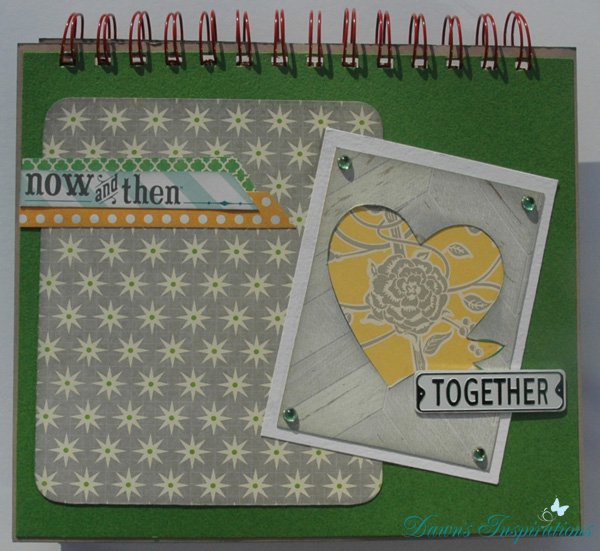
Here is my take on a Mini Album is a designed by Steff Miller, she did a free ustream class to show you how to make it, so all kudos to Steff for a great design and I have loved making this project.

The project uses 2 paper bags and some card stock.
As for the patterned paper the Ladies Diary one I made using scraps I had left from another project and the Noir Chic one was made using new sheets of single and double sided paper.

I was requested to make a video as some of you have found it hard to follow the Ustream method.
I hope you like my video and you too can enjoy making this lovely Paper Bag Pocket Wallet Mini Album By Steff Miller as it is a super cute mini!

It is hard to give measurements as everyone will have different sizes bags depending on which country you are in but what I have done is made 2 PDF sheets for the basic measures for the 2 paper bag sizes I have used.

Paper Bag Pocket Wallet Mini Album Size 3.5 x 6.25×2

Paper Bag Pocket Wallet Mini Album 4.7×2.8×8.9

Filed Under: Free Tutorials

Paper Bag Tag Mini Album

IMG_0936
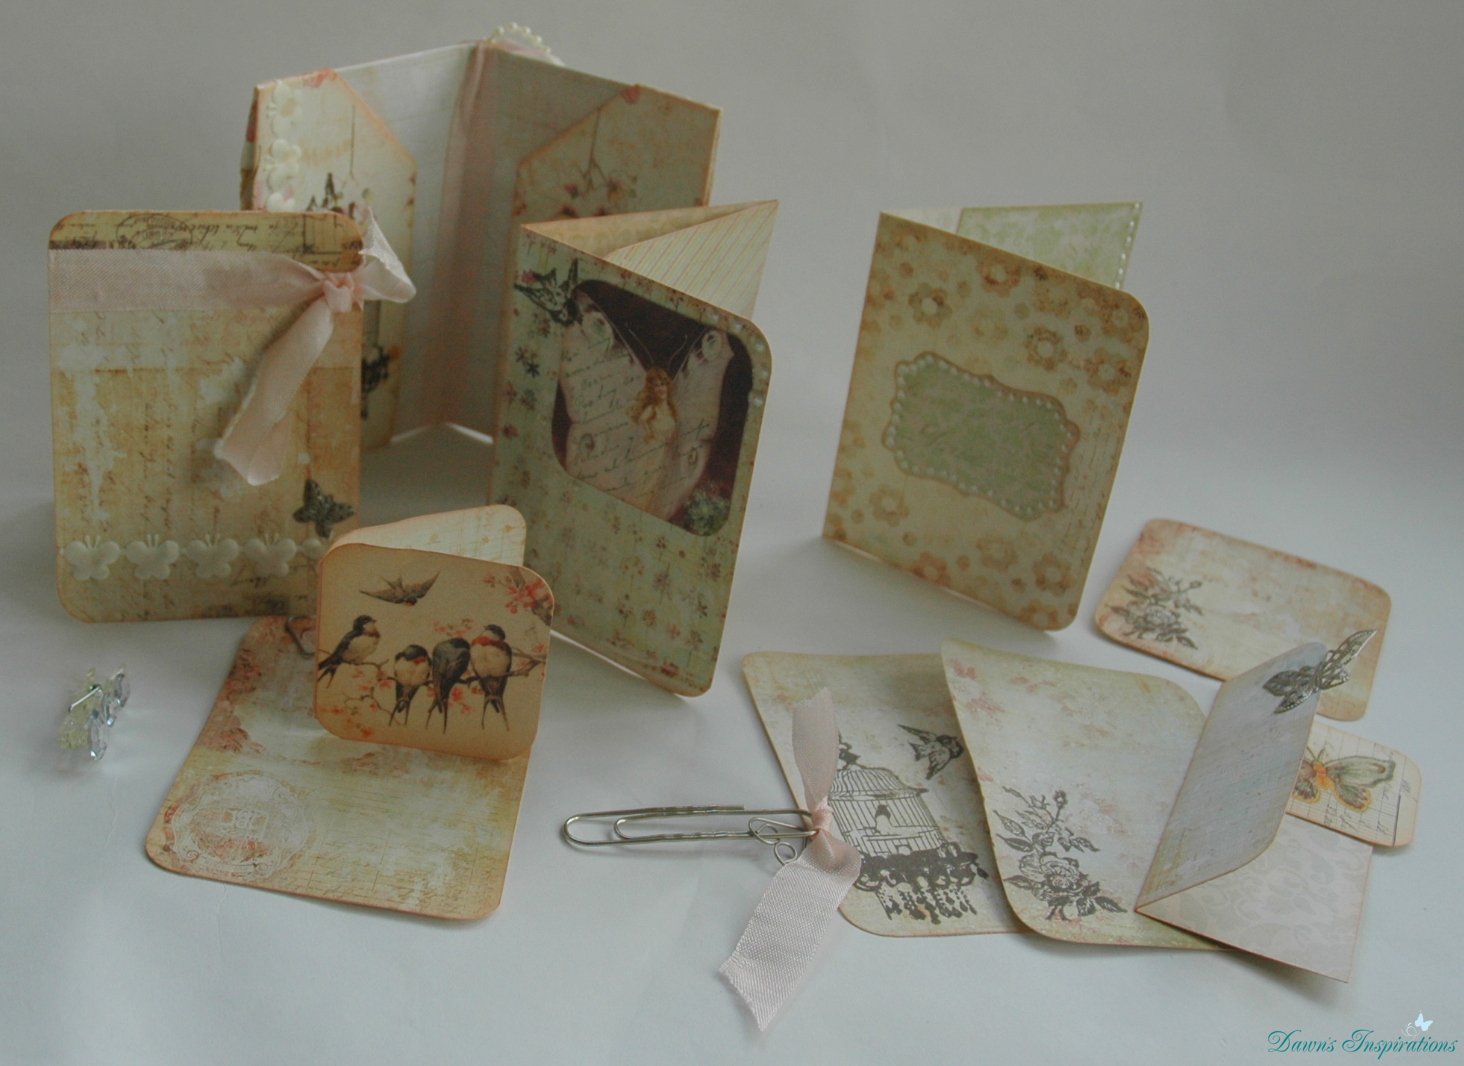
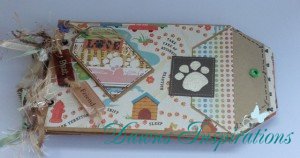
Here is a great tag book mini I have made following Stephanie Miller’s Tutorial https://www.youtube.com/watch?v=zNhsKVlIbtg.

After watching one of her other tutorials I love this idea and wanted to share it with you all.

IMG_0940
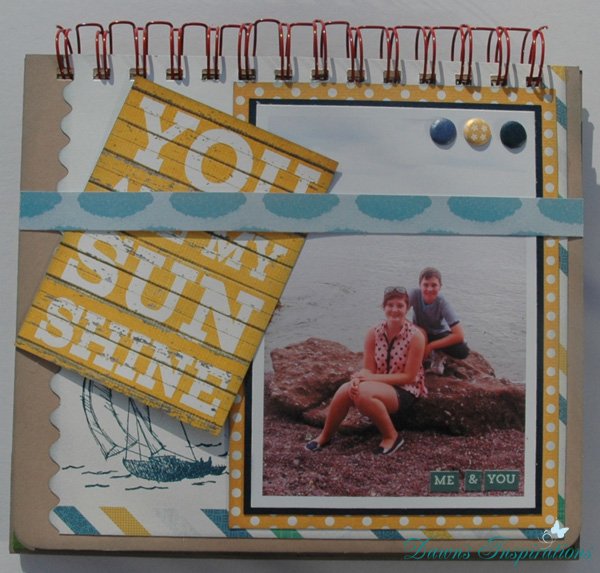
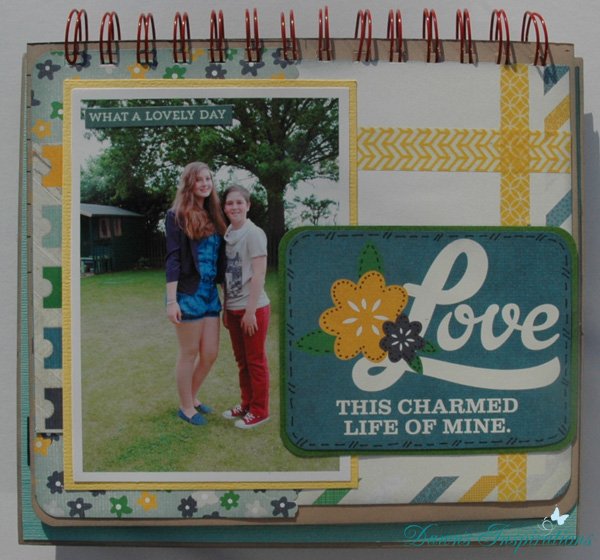
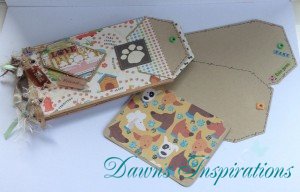
The paper collection and bags where sent to me by my subbie Maria and I have really enjoyed crafting with them.

The paper collection is DCWV The Pets Sack and I used the 4 1/2″ x 6 1/2″ papers.

Filed Under: Free Tutorials

One Paper Bag Brag Wallet

Here is a great little mini that is quick and easy to make.
All you need is one paper bag, some cardstock and patterned paper of your choice.

IMG_0931
IMG_0934

If you are in the UK and cant get craft paper bags you can still join in using shopping paper bags.
I the video tutorial I will show you how to make this mini album using both methods.

The bags size I have used is 4.7 x 2.8 x 8.9 inches.
Cut the long side of the bag to measure 8 3/4 inches, then score this at 6 inches.
Cut 2 pieces of cardstock measuring 5 7/8″ x 5 1/2″ and stock both of these at 1″ and 1 1/8″
Photo mats cut 3; 4 1/4″ x 4″
3 3/4″ x 4 3/8″
5 1/8″ x 4 3/8″
Follow the video tutorial as I craft along with you to make this super brag Wallet.

Filed Under: Free Tutorials

My Crafty Stash from the US

10418241_289263151253851_8245417656583708474_n
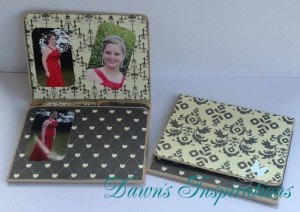
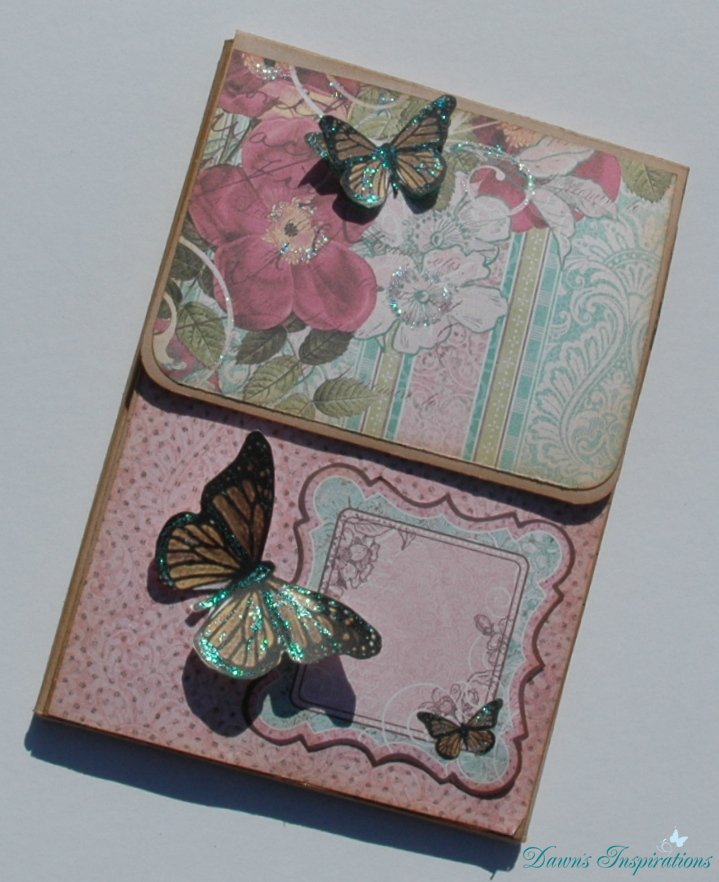
I would love to send a big thank you to Maria as she sent me this lovely gift from US.

She wanted me to do some Video Tutorials using Paper Bags, here in the UK we can not get these bags for crafting.

Here is a overview of some of the mini albums.


Filed Under: Free Tutorials

Style 6 File Folder Mini Scrapbook Album

file-folder-miniI know a lot of you are enjoying this File Folder Mini Series as you can make scrapbook mini albums out of a normal foolscap office file folder and freebie paper collection from a craft magazine. I have used the Bo Bunny Country Garden Collect that came free in Scrapbook Magazine Issue 80.

Here is another File Folder Mini Album for you this is made in a cheque book style.

Using one foolscap file folder, keep this folded then on the long side cut this in three  4 ½ ” strips.

Page 1/ cover – On the long side score this at 1 3/8” 1 7/8” 9 ½” & 10 “. Then cut at 7 ½”.

Page 2 – First cut the long side to 7 ½” and then score this at 7 ½” & 8”.

Page 3 – First cut the long side to 7 ½” and then score this at 7 ½” & 7 ¾ ”.

Craft along with me and follow  the video tutorial then we can make this File Folder Mini together.

Filed Under: Free Tutorials

Micro Mini Scrapbooks

micro-mini-1
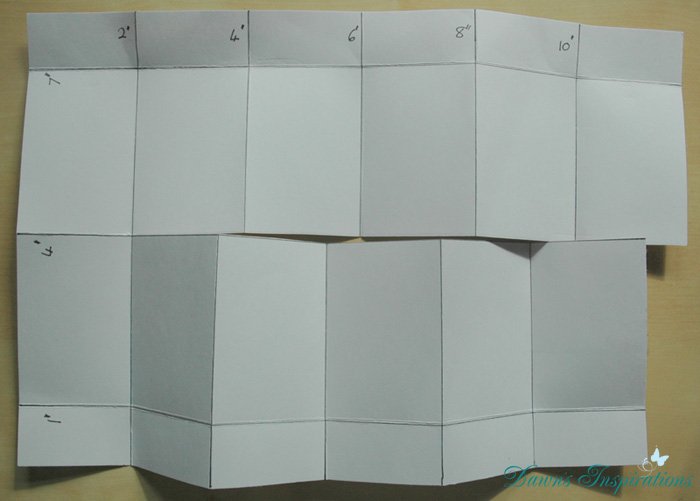
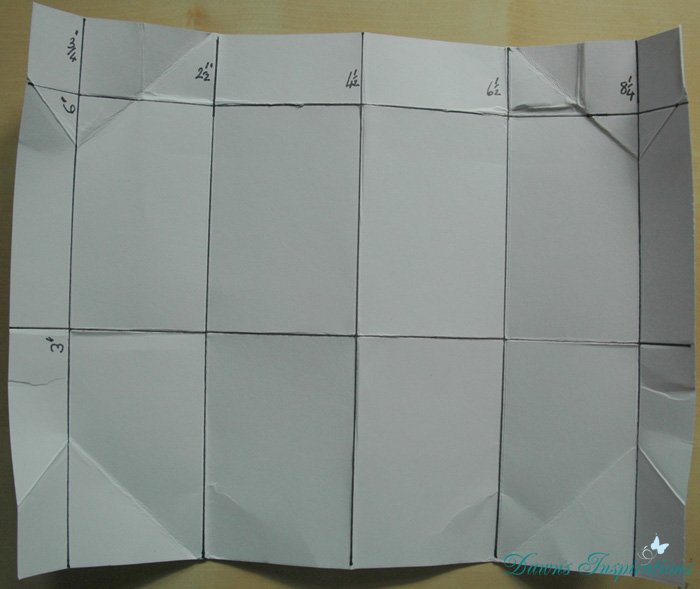
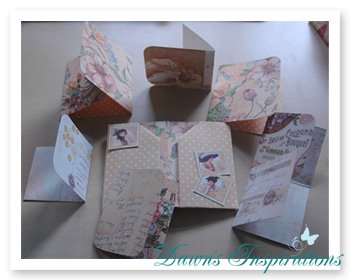
Mini Scrapbooks out of One Sheet of 12×12.

I have had a request from one of my fellow crafters Jill to make a Micro Mini measuring 2” x 3”.

I have made them on the same theme in 3 different designs so I hope you like them?


Here are the measurements for each Mini Micro Album, now you can watch the video and make up your albums.

Click  Here to View Larger Image

Click Here to View Larger Image

Micro Notebook Scrapbook Cut paper 12″ x 6″
on 12″ side score at 2” 4” 6” 8” & 10”
on 6″ side score at  3″
Cut along to the last score line and fold


Click Here to View Larger Image

Click Here to View Larger Image

Micro Pocket Book Paper needs to be 12″ x 8″
on the 12” side score at 2” 4” 6” 8” & 10”
on the 8” side score at 1” 4” & 7”


Click Here to View Larger Image

Click Here to View Larger Image

Micro Wallet Pocket Book Cut paper 9″ x 7″
on the 9″ side score at  3/4″ 3 ½ ″ 4 ½ ″ 6 ½ ″ & 8 ¼ ″
on 7″ side score at 3″ & 6″

These Micro Minis can be used as Mini Scrapbook Albums charms to add that little something different to your projects. Or even small embellishments to add to a page.

Filed Under: Free Tutorials

Card Frame for Father’s Day

card-frame-2
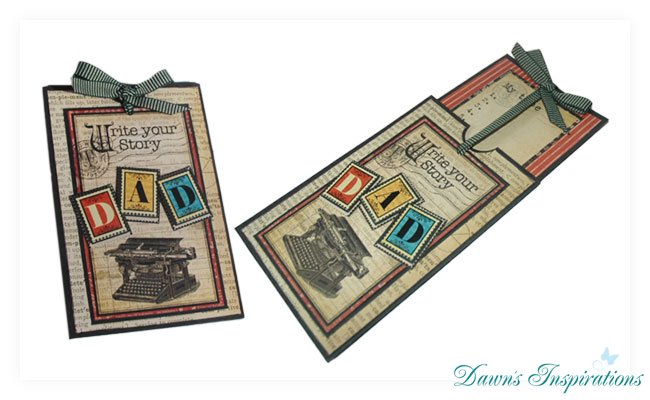
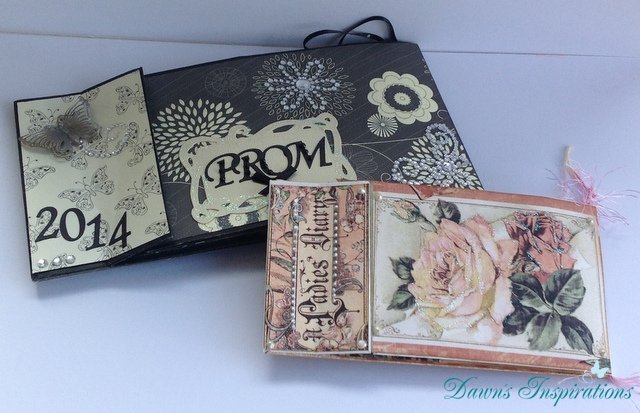
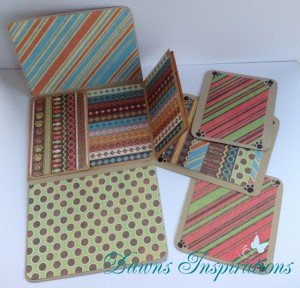
Here in the UK Father’s Day is in a couple of weeks, so here is a quick and easy project.

The Card Frame makes a great gift, all you then need to do is slip in your 6×4 photos and you have the perfect gift to put a smile on any Dad or Grandfathers face.

So get crafty and make a special gift for the man in your life.


Supplies you will need;

2 sheets of A4 Kraft Card

I sheet of kraft packaging or chipboard

Embellishments if you wish

2 photos of 6×4 measurements

Measurements;

Cut one of the A4 sheets to measure 7″ x 11 1/2 ”  Next I put this through my Ebosser using the A4 Cable embossing Folder.

I then on the longside scored this in 5 1/2″ on either end. Using a distress ink pad I then inked over the embossed pattern to show more texture.

Next I stuck this down to my Kraft packaging/chipboard using Collall All Purpose Glue and set it to one side to dry. While this is drying you can then make your frames.

From your other sheet of kraft card cut 2  pieces measuring 5 1/2″ x 6 3/4″ and score this in at 1/4″ on 3 sides. Now using a cutting die or kraft knife make an aperture frame to showcase your photos. Ink you edges to match your project.

Using your stamp of choice you can stamp a background to your cover to give this a patterned look. I then used a letter stamp set to make my words to give my project a personal touch. I cut these out and stuck them down with 3D Glue.
card-frame-1
Your Card Frame is now ready for you to add your photos and give as a gift for Fathers Day.

Other ideas for Fathers Day Gifts

Slider Card Tutorial

Faux Leather Notebook Cover Tutorial

Desktop Flip Style Mini Album Tutorial


Filed Under: Free Tutorials

Desktop Flip Style Mini Scrapbook Album

flip-style-mini
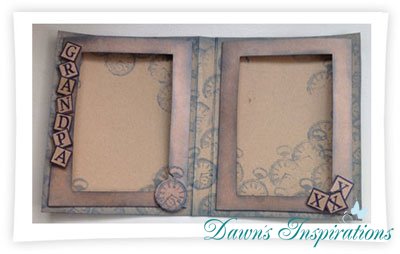
This project was a request from one of my followers Leslie so I do hope she enjoys my tutorial?

I have made this project using a Scrapbooking Kit from Papermaze and a foolscap file folder.

I really enjoyed this project as it meant I could do lots of mini scrapbook layouts, you do not need to add photos you could use quotes instead. Why not use your favourite inspirational quotes or sayings.

This make a great gift for both male and female and can be made to fit any age too.

So let you creativeity loose and enjoy making this project.


The video tutorials are on a playlist so the next one will follow once the first one if finished.

Measurements for the project – follow the video tutorial to make this project.

Using a foolscap file folder;  fold this in half and cut it to measure 8″ x 8 1/2″ (do not cut on the folder side)

Put your folded side up to the edge of your score board and score this at 1 1/2″.

From the scaps cut 4 pieces measuring 8″ x 1 3/8″ these are to reinforce the base.

Next cut 4 pages, 2 measuring 7 3/4″ x  6 3/4″ and 2 measuring 7 1/2″ x 6 1/2″.

Using A4 cardstock;  You will need 6 sheets.

Cut 2 piece measuring 8 1/2″ x 10″. Next use your scraps and cut these at 8 1/2″ x 1 3/8″.

Then on the londside score at 7″ and 8 1/2″.

Next cut 4 pages, 2 measuring 7 3/4″ x  6 3/4″ and 2 measuring 7 1/2″ x 6 1/2″.

Binding your project; This can be done in one of 3 ways, using a Bind it All, a Cinch or book rings.

So get creative and make your own Desktop Flip Style Mini Album.

Page Layouts


Filed Under: Free Tutorials

Slider Card and Slider Mini AlbumTutorial

slider-main-image-01
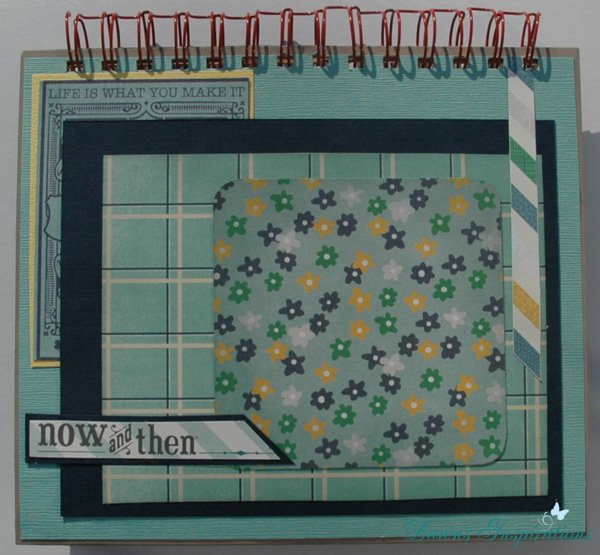
I will show you not only how to make you own slider cards but also how you can make a Slider Mini Album too.

To make a Slider Card to fit in a C6 envelope.

a C6 envelope is roughly 6.4″ x 4.5″ so to make a slider card to fit in this size envelope you will need to cut your card stock 8 1/2 “x 6 1/2″.

On the short side score this at 6″ the quarter turn and on the long side score this at 4″ & 8”.

Cut another piece of card measuring 3 3/4″ x 5 1/2″  this is be the slider. You will also need a lengh of ribbon roughly 24″long and patterned paper to decorate.

Now watch the video tutorial and craft along with me to make your slider card.
slider-main-image-02

To Make your Slider Mini Album.

You will need 4 sheets of 12×12 cardsock, a 6×6 paper pad collection, an empty cereal box for the cover, acrylic paint ribbon and embellishments.

Put 1 sheet of 12×12 cardstock on your scoreboard and score at 5 3/4″ and 6 1/4″.

Do a quarter turn and score at 1/2″ to the scecond score line only.

Then do a half turn and score at 1/2″ to the second score line only.

Flip your paper over and score at 5 3/4″ to the first score line.

Do a half turn and score at 5 3/4″ to the first score line.

Then watch the video tutorial to cut the cardstock so you can get 2 pages from 1 sheet of 12×12 cardstock.

Follow the rest of the video tutorials and craft along with me to make this great Slider Mini Album
slider-main-image-03

Filed Under: Free Tutorials

Style 5 File Folder Mini Album Tutorial

Here is Style 5 in my File Folder Mini Series. With my step by step video tutorial you can craft along with me to make this beautiful mini album.
DSC_0057

Again all I have used is an office foolscap file folder, a couple of photo mats cut from some kraft card stock and  patterned papers that came FREE with Scrapbook Magazine Issue 78, so with the use of a very few materials you to can make a quick and easy mini album to house lots of photos and memorabilia.

With you file folder in the folded position cut this down to measure 13″.

On the long side score this at 3 1/2″ then 9 1/2″ next butt the 9 1/2″ score line to the edge and score again at 6″.

On the short side score at 4 1/4″ and 4 3/8″ then at 8 5/8″ and 8 6/8″.

Watch the video tutorial and craft along with me to make this File Folder Mini Album.

For magnets I used a company based here in the UK “First4magnets” and got size 10mm diameter x 1mm thick.

So go on, dust off your file folders and make a mini scrapbook album!

Filed Under: Free Tutorials

Prima Wallet Pocket Mini


DSC_0097-001


This is a project I filmed as a tutorial last year after a workshop I did with the MDF Man.

Jodie Lee one of the paper designs from Prima then use this mini in one of the Ustream live videos and thanked me for sharing so I thought I would share it again with you.

I was so pleased that she had not only been watching my video tutorials but that she had choosen to use this mini albums for her live Ustream tutorial to showcase her latest Princess Paper Collection.

Many of you have been in touch after seeing her video with such lovely comments so I decided to re film it using Jodie Lee Princess Collection.

I used one sheet of the Lily Paper for the main wallet and one sheet of Mia and some of Collage for the tags and booklets.

You can see my video tutorial so you to can make this beautiful Wallet Pocket Mini. This great little wallet uses no adhesive and very few materials so a great project. Go on why not have a go at making your own and revisit one of my favorites.

DSC_0086-001

Here is the link to my original https://www.youtube.com/watch?v=CJBF8…

here is the link to Jodie Lee Ustream video https://www.youtube.com/watch?v=ofXaK…

Filed Under: Free Tutorials

  • « Previous Page
  • 1
  • …
  • 7
  • 8
  • 9
  • 10
  • 11
  • 12
  • Next Page »
  • My Account

Newsletter


I give my consent to Dawns Inspirations to be in touch with me via email using the information I have provided in this form for the purpose of news, updates and marketing.


  • Shop
  • Account

Copyright © 2025 · Dawns Inspirations

Copyright © 2025 · Dawns Inspirations on Genesis Framework · WordPress · Log in